![[FISH]rx Logo in Black](https://fish-rx.com/wp-content/uploads/2025/07/FRXLOGO-BLK.png)
If you’re brand new to SoCal inshore bass — whether you’re crossing over from freshwater, picking up a rod for the first time, or you just moved to LA and want to know where to start — this guide is for every SoCal inshore bass beginner asking the same question: what do I actually need to know? The short answer is that you don’t need much gear, you don’t need to fish at the perfect time, and you don’t need to master every technique. You need to find some structure, get your bait near the bottom, and pay attention to what the fish are telling you.
That’s the whole game. Everything else is refinement.
What are you actually chasing as a SoCal inshore bass beginner?
Most beginners don’t know the difference between spotted bay bass, calico bass, and sand bass when they show up. All three fall under the same regulations: 14-inch minimum, 5-fish combined bag limit, but they live and behave differently enough that it’s worth knowing what you’re fishing for before you make your first cast.
Spotted bay bass
Spotted bay bass are a harbor fish. They live in back bays, estuaries, eelgrass beds, rocky areas, and near docks, and if you’re fishing any of our harbors from San Diego to Venture, spotties are going to be your primary catch. They’re the smallest of the three species. A 22-inch spotty is a legendary fish, and legal fish typically run 14 to 17 inches, but they fight like they know they’re the underdog.
What makes them interesting is what they eat. Spotted bay bass feed primarily on crabs and clams. That’s why a craw bait fished slowly near the bottom often outperforms a paddle tail when spotties are pressured or finicky. The biology backs the presentation.
They also hug structure harder than the other two species. Docks, pylons, rocks, mooring lines, eelgrass edges. A spotted bay bass is almost always tucked against something. Fish the structure, find the spotties. The spotted bay bass guide covers the back bay game in full if you want to go deeper on that species specifically.
Calico bass
Calico live on kelp, reefs, and harder structure along the open coast and harbor walls. You can catch them in the same harbors as spotties and often more abundant at the harbor breakwalls. They’re more common around the islands and up and down the coast of Southern California. They get bigger than spotties, double-digit fish exist, and they eat primarily baitfish, which is why swimbaits and paddle tails dominate calico fishing.
On the wall, bigger profiles are fine. Calico will eat a bait that spotted bay bass would completely ignore.
Barred sand bass
Sand bass overlap with calico on rocky structure, reefs, and the bottom of kelp streamers. They can show up in harbors but they’re more common once you’re fishing the coast. Their stock is currently depressed, which the fishing community has felt. The bag limit reflects that, with barred sand bass capped at 4 of your 5-fish combined total through June 2028.
For a beginner, don’t overthink the species separation at first. Go to the harbor, fish structure, and get bit. You’ll figure out what’s what by catching them.
What do I actually need to get started?
Here’s the setup I’d put in a beginner’s hands for their first few sessions in a SoCal back bay. Not the theoretically optimal kit — the practical one.
Rod, reel, and line
A 7’2″ medium-fast action rod rated for 10–17 lb is the workhorse of this fishery. It’s light enough to throw 1/4 oz, heavy enough to throw 3/4 oz, and it handles everything in between. That weight range covers most of what you’ll throw day to day.
For the reel, I’m using a 150-size baitcaster from Bates Fishing Co. Paired with 30 lb braid and a 15 lb fluorocarbon leader, you have a setup that’s sensitive enough to feel a subtle pickup and strong enough to pull a fish out of the pylons before it wraps you. Adjust the leader up or down based on water clarity and how much pressure the fish have seen.
I use the RP knot to tie braid to leader when fishing for bass; it’s a good knot that is tried and true. I will tie the FG knot when I’m fishing the islands and bigger fish off shore. Both knots are good to know. Get confident in tying braid to leader – that will make one set up more versatile. A starting point is being able to change leader to fit the environment, 15lb leader for spotties and 30lb for calicos, but that can change depending on your preference and fishing style.
Four rigs to know
Start with these and you won’t need anything else for a long time.
Lead head and paddle tail. The simplest setup in harbor fishing. Cast it out, wind it back, keep it near the bottom. It covers a lot of range within one setup: go lighter in shallow eelgrass, go heavier in deeper water or current. The paddle tail rigging guide covers hook sizing, head styles, and retrieve options in detail.
Texas rig. This is the one I’d put in your hand first. A bullet weight, an EWG hook, and a soft plastic. The 4-inch RX Slug or 3.25-inch skeleton craw is where I’d start. Fish it on the bottom: hop it, pop it, drag it, dead-stick it. In bays with grass, you’ll be fishing through and above the grass and letting it drop back down. It’s weedless, versatile, and catches fish doing almost nothing.
Jika rig. Similar to the Texas rig in principle: bottom contact, lots of action from the bait itself, but with a different weight attachment that gives the plastic more freedom to move. Solid year-round option.
Drop shot. A hovering presentation that keeps your bait just off the bottom. Once you understand the first three rigs, the drop shot adds a different dimension, especially around dock structure where fish are suspended. The drop shot guide covers the full setup.
Don’t overthink the action
Most beginners think they need to work the bait aggressively to get bit. You don’t. The water does more than you think: the current moves the bait over ridges, bumps it along the bottom, makes it dart and shake without you doing anything.
Low and slow catches fish. You can always go too fast, but you can never go too slow.
Low and slow catches fish. You can always go too fast,
but you can never go too slow.
Start with minimal action and add more only if the fish ask for it. They’ll tell you what they want.
How do I read the water when I don’t know what I’m looking at?
This is the part that takes the longest to develop. It’s also where most beginners get stuck. Here’s a practical framework.
Structure is anything you can hide near
When you’re standing at the edge of a back bay for the first time, look for anything that breaks up open water. Docks and floating platforms. Dock pilings and pylons. Rocky edges and channel drops. Grass beds. Mooring buoy ropes running down to the bottom. Boat shadows.
All of it is cover. A fish could be hiding under it, beside it, or using it as an ambush point to eat something passing by. The more structure, the more likely there’s a fish nearby. Cast to the edges, cast tight to the pilings, and let your bait fall alongside the structure rather than past it.
That’s the whole read for a beginner. Cast at stuff. Not at nothing. The structure guide goes deeper on how to identify which types hold fish and why.
Tide: the two-hour window
If you can choose when you fish, the two hours before peak high or low tide and the two hours after it are your best windows. Water moving through a harbor pushes baitfish, activates feeding, and positions fish predictably near current breaks and structure edges.
That said, most of us don’t get to pick. If the only time you can fish is mid-tide, go anyway. Fishing outside the prime window teaches you things about why the fish aren’t biting. Figuring that out is what turns a beginner into someone who catches fish consistently.
What to do when you’re not getting bit
The fish are usually there. If you’re not getting bit, something about your presentation is off: your depth, your speed, your location, or your retrieve style. Change one thing at a time and pay attention to what changes.
Start by moving. Cover different parts of the same section before you write off a spot. If you’ve fished it thoroughly with no result, try a different rig or a different bait profile. Then try a different weight. Speed is often the last thing beginners adjust, and it’s frequently the answer.
Slow days aren’t wasted days. They’re just sessions where the fish are making you work for the information.
Slow days aren’t wasted days. They’re just sessions where the fish are making you work for the information.
Hook sets for SoCal inshore bass
One thing that catches beginners off guard: these fish go straight for the rocks the moment they feel the hook. A spotted bay bass that bites at the base of a pylon is going to run directly into it. Keep your drag buttoned down, high-stick when you need to, and steer the fish away from structure from the moment it turns. The hook set mechanics guide covers the full setup. Worth reading before your first session.
How to handle the fish
Wet your hands before you touch a fish. Hold it horizontal, not vertical by the jaw: these are smaller fish and the jaw pressure from a full vertical hold can cause injury. Keep it out of the water as briefly as possible, especially in warmer months. Deep hook? Cut the line close to the hook and let the fish go. The hook rusts out. The fish lives. From whence it came.
Finding your footing in the SoCal inshore community
LA’s fishing scene is unique. The mix of urban culture, easy water access, and a community of people who are genuinely interested in teaching makes it one of the better places in the country to come up as a new angler.
Instagram is the fastest way in. Follow local anglers, watch what they’re fishing and where, and don’t hesitate to ask questions. Most people in this community will answer. Tackle Meets are another entry point: local retailers, bait makers, and anglers in one place, and the conversations there are worth more than most YouTube content.
The fastest path to actually getting better is finding someone who fishes this water and spending time with them on it. Mentors tell you the things that never make it onto camera. Time on the water handles the rest. Field Notes gives you the framework, but the fish teach you the last part.
Mentors tell you the things that never make it onto camera. Time on the water handles the rest.
Getting started without a fishing license
California requires a fishing license for most saltwater fishing, but there are two legitimate ways to get on the water first.
Free public piers. California’s designated public piers don’t require a fishing license. That said, pier fishing in SoCal is a different style from harbor fishing. You’re typically fishing bait on the bottom for sharks, rays, and mackerel, not targeting inshore bass with artificials. It’s a fine way to get a rod in your hands and feel the difference between a bite and a snag. Just go in knowing it’s a different game. CDFW has the full list of free fishing piers if you want to find one near you.
Free fishing days. California designates two free fishing days each year, typically one in early July and one in early September, when no license is required statewide. All other regulations still apply. Check CDFW’s current regulations for the exact dates each year before you go.
My honest take on those days: if you want a calm, productive first session, they’re probably not the ones to pick. Holiday weekends bring heavy boat traffic, noise, and enough commotion in the water to push fish down and shut off the bite. Fish are introverts. They don’t love a party. Save the free days for a social outing and plan your actual first session for a quieter morning.
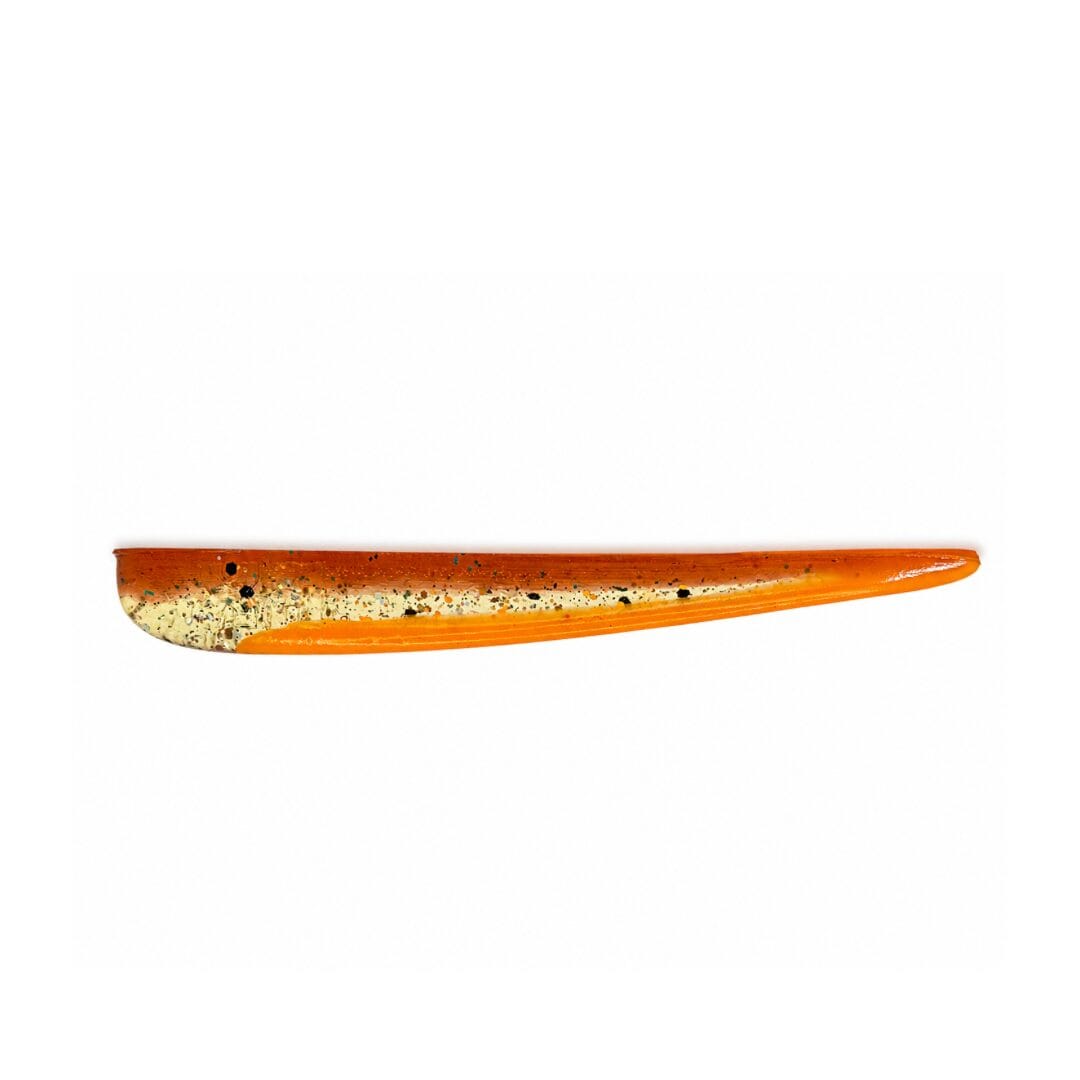
RX Slug & RX Skeleton Craw
The 4-inch RX Slug on a Texas rig is where I’d start any new inshore angler. It fishes the bottom, works in eelgrass, and catches fish doing almost nothing. Once you’re comfortable with spotted bay bass, add the RX Skeleton Craw: spotted bass eat crabs and clams as their primary prey, and a craw presentation fished slowly near structure matches what they’re already looking for.